Microphotography
Jump to navigation
Jump to search

The printable version is no longer supported and may have rendering errors. Please update your browser bookmarks and please use the default browser print function instead.
The article deals with microphotography, i.e. creating microphotos.
Taking the picture
The keys to good pictures
- Spend time on set-up.
- Clean the slide.
- Look for the pristine areas without artifacts, e.g. folds.
- Composition.
- Put normal beside pathologic - so one has a reference point.
- Transititions are usually interesting.
- Where to put the centre of interest:
- Truly beautiful: use the rule of thirds - see composition section.
- Functional: centre of interest in the centre.
- Put normal beside pathologic - so one has a reference point.
- Focus.
- Sharpness of nuclear membrane and detail in the cytoplasm.
- White balance.
- De-vignetting.
- Pictures at different magnification.
- Sets are usually better than one.
- Many entities have high and low power features.
- It is often impossible to capture them with one picture.
Camera settings
Exposure compensation:
- None.
White balance:
- Normal.
Focusing
Setting live view:
- Rench (II).
- Live view function settings.
- Live View shoot.
- Live view function settings.
- Press "Set" button to open the shutter.
Use the zoom button (on the camera): press twice to digitally magnify 10x.
- Focus microscope as usual (@ 10x digital magnification).
Note:
- Post-processing will not fix a blurry image. The way to get sharp images is take sharp pictures!
Composition
Functional pictures that tell a story and are easy to understand:
- The centre of interest at the centre.
An artsy look can be achieved by making use of the rule of thirds.
- Rule of thirds: centre of interest is at one of the four intersects of the imaginary lines that divide the image into thirds.
Post-processing
GIMP scripts:
- White-balance.
- Shadows & highlight.
White balance
- May be done with:
- White balance plugin.[1]
- Curves function (in GIMP).
Curves function (in GIMP)
- Adjust magnitude, then blue, then green -- red should be last.
- Low magnification images tend toward "too pink" with the white-balance script.
White balance plugin (script)
Procedure:
- Select
- Filters.
- Colors.
- White balance.
- Colors.
- Filters.
- Use eye dropper to select what should be white on the image.
- Set to "background color".
Vignetting
Defintion:
- The edge of images are darker than the centre.
Microscope configuration:
- Köhler illumination.
- Ensure diaphragm is open.
Some random notes:
- Software for microscope cameras usually have de-vignetting tools. The tools go by different names and usually entail taking a background image. Ideally, one should shoot the background image at the same magnification as the (primary) image.
- Vignetting is usually worse at lower magnification.
Random links:
- http://www.gimp.org/release-notes/gimp-2.4.html.
- http://www.gimp.org/release-notes/gimp-2.4-videos.html.
De-vignetting
Student method
- Take picture as one wants.
- Remove slide and shoot the background.
In GIMP:
- Load image.
- Load background as a layer ("Open as layer... ").
- Make background into an "overlay" in Layers dialog box.
- Invert background.
- Save as jpg (merge with background).
Adapted from codeforhire.com
Procedure:[2]
- Load image in GIMP.
- Duplicate layer (right click on layer and select Duplicate Layer).
- Apply Gaussian blur to top layer.
- Filters -> Blur -> Gaussian Blur
- Select a blur radius 1/5 of the smallest dimension of the image.
- If the image is 2768x2110, the blur radius should be 2110/5=422.
- Select a blur radius 1/5 of the smallest dimension of the image.
- Filters -> Blur -> Gaussian Blur
- Invert top layer (Colors - Invert).
- Change top layer to Overlay mode.
- Normal top (masking) layer (Colors - Auto - Normalize).
- Adjust brightness of (top) layer (Colors - Brightness-Contrast).
- Merge layers.
- Right click on top layer and select Merge Down.
Stitching
- A technique to increase the field of view.
Software:
Images
Focus stacking
- A technique to increase the depth of field.
Software:
Image:
Dirt and defects
- It is best to clean the slide.
- Photons are free... time is not.
- Dirt and defects can be removed with the clone tool in GIMP.
Sharpening
- Images should be sharpened to enhance edges.
- This is particularly important if the image is projected on a large screen and/or enlarged.
- Over-sharpening makes images look like caricatures.
- Sharpening should be the last step in post-processing.
Animation

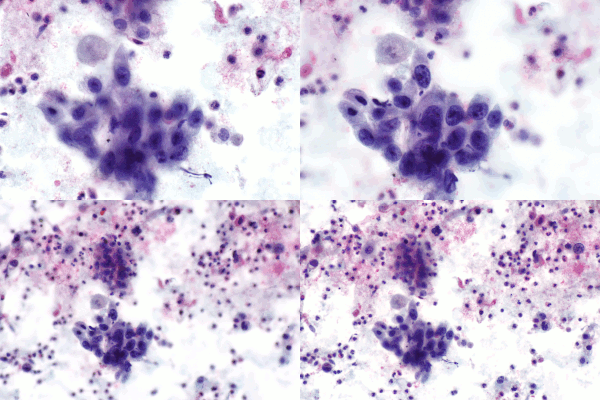
An animated GIF showing squamous carcinoma of the lung. (WC)
- GIMP has a nice tutorial (gimp.org) on how it can be done.
- Animations are particularly useful for cytopathology.
See also
References
- ↑ URL: http://registry.gimp.org/node/72. Accessed on: 26 July 2010.
- ↑ URL: http://codeforhire.com/2013/06/29/simple-image-devignetting/. Accessed on: October 16, 2014.


